Thursday, July 7, 2011

Tutorial: Smokey eye tutorial n°2 (using MAC eyeshadows)

Hey everyone!


So here's my second smokey eye tutorial.
I'm going to do kind of the opposite of what we did l did for the first smokey eye where I put the darkest shades on the lid and the lighter one in the crease. This time I'm keeping the lid light and putting the darker shades in the crease.
I'm using All That Glitters as my lightest shade, Twinks as my medium shade and Beauty Marked as the darkest (all from MAC). The other products I used are the same ones I used last time: Zero 24/7 eyeliner pencil from Urban Decay, False Lash Effect mascara from Max Factor, lashes from Claire's and Select Cover-up concealer from MAC. 


(BTW: all pictures are clickable for larger views!)


I started off with my brows (using Brun eyeshadow / MAC), brow highlight (using Vanilla eyeshadow / MAC) and primed my eyes with Urban Decay Primer Potion.


Next I applied the lightest shade, 
All That Glitters from MAC, on the lid with a flat shader brush (MAC 239) and the inner corner with a pencil brush (MAC 219), fading it towards the crease.


I then put the medium shade, Twinks from MAC, in the crease and outer corner with a blending/crease brush (MAC 217) and smudged it along the lashes with a pencil brush.


I lined my upper lashline with a black eyeliner pencil (Zero / Urban Decay). This doesn't have to be perfect cause we're going to smudge it out anyway.


I used Beauty Marked from MAC and a pencil brush to smudge out the liner and darken the outer corner.


On the lower lashline, I applied the same eye pencil to the waterline and smudged it in to the lashline. Again, doesn't have to be perfect, just make sure the line is thicker on the outer corner and thinner towards the inner corner.


I then put All That Glitters on the inner half of the lower lashline and Twinks on the outer half.


Finally, to finish the look I applied mascara (False Lash Effect / Max Factor) to the top and bottom lashes, added false lashes (Claire's, they don't have a name or number sorry) and concealer (Select cover-up NW20 / MAC).


And that's it, all done!


Hope this helped and if you have any questions, feel free to ask!


x
Tanja

Monday, July 4, 2011

Tutorial: Smokey eye tutorial n°1 (using Urban Decay's Naked palette)

Hello!
Remember me :)?  I've been super busy, but I'm back and I have a tutorial for you!

This is gonna be a tutorial on one way of doing a smokey eye. For this look u only need 3 shades in whatever color you choose, a light one (Toasted / Urban Decay), medium ( Hustle / Urban Decay) and a dark shade (Creep / Urban Decay), a highlight color (Virgin / Urban Decay),an eyeliner pencil (Zero / Urban Decay) and mascara (False Lash Effect / Max Factor). The light color doesn't really have to be light. You can go as dark as you want, the light color just has to be lighter than the medium color and the medium color has to be lighter than the darkest one. Did that make sense? Yes? Good :)


I put my Tumblr url on the pictures before I decided to post them on here too, so ignore that or go check out my Tumblr!

I started off by doing what I do before pretty much any eye look. I primed my eye with Urban Decay Primer Potion (UDPP), filled in my brow with Brun and highlighted my brow bone with Vanilla, both from MAC.
I then lined my top and bottom lashline and waterline (tightline) with Zero 24/7 pencil form Urban Decay. Doesn't have to be neat, we're going to smudge it out anyway.


Next, I smudged out the liner on the top and bottom with Hustle from Urban Decay (Naked Palette) with a pencil brush (MAC 219) and brought it up to the crease with a flat shader brush (MAC 239) and blended it out a little.


I then took my lightest shade, Toasted from Urban Decay (Naked Palette), and put it in the crease with a blending brush (MAC 217) and blended it upwards. You can go up to the brow as far as you like. Go back with your medium shade if you want to intensify it a little more after blending. I also smudged Toasted along the lower lashline with a pencil brush and put Virgin from Urban Decay (Naked Palette)in the inner corner as a highlight.


To make the lashline even darker, I used Creep from Urban Decay (Naked Palette) right along the top and bottom lashes. Add plenty off mascara. I used Max Factor False Lash Effect. I also applied false lashes (I used lashes from Claire's), but that's totally optional! Finish with concealer under the eyes, I used MAC's Select Cover-up in NW20. You can do your concealer before you do anything else, but I prefer doing it last so I can wipe away any fallout that might have dropped under my eyes.


Et VoilĂ ! You're smokey eyes are done!

Hope this was helpful and I'll be back with the second smokey eye soon!

x
Tanja

Wednesday, February 2, 2011

I'm on Tumblr!

I'm posting pictures of pretty much anything I like on there.
Check it out!


x
Tanja

Tuesday, February 1, 2011

I'm back + January favorites

Helloo!

Sorry I'v been MIA (missing in action) for so long... But, now the exams are almost over I'll be posting more often again, and I'll start off with favorites.I'm gonna try and do these monthly. I did say try ;)


So here are my january favorites:


* MAC - Mineralize Skinfinish Natural (in Medium): I don't have good skin, so I usually wear foundation with a pretty heavy coverage. On days that I wanna give my skin a break and don't want a thick layer of foundation, I use Mineralize Skinfinish Natural to even out my skintone. When I am wearing liquid foundation, I like using it as my setting powder.

* The Balm - Balms Away: I ordered this from the Beauty Queen webshop a while ago and I've been using it since to take off my makeup. On the back it says: "Apply a dollop onto closed eye. Keep eye closed. Move product in circular motion allowing makeup to break up (30 seconds). Wipe away with soft tissue and see amazing results." It does break up the makeup nicely and I sometimes use it on my entire face before I wash it with a cleanser. It makes it so much easier to take off mascara and waterproof makeup. I don't have to rub my eyes as much so I don't pull out as many lashes. Plus, the balm feels really moisturising.

* Max Factor - False Lash Effect: This has been my favorite mascara for almost a year now. I've been loving it since I first got it. I think this is my 4th one and I have 2 backups lol. Whenever it goes on sale I pick one up cause it's quite expensive (€16.99). I plan on trying Covergirl's Lashblast next cause it has the same type of brush and it's cheaper (about €10 I think). As far as I know, Covergirl is only sold at Delhaize in Belgium and only the bigger ones. I'll try and remember to look for it next time I'm close to a Delhaize.

* Les CosmĂ©tiques - Makeup wipes: I think this brand is only sold at GB or Carrefour, but i love these wipes. I use them after the Balms away and they work great. And they're pretty cheap too!

* The Body Shop - Almond Oil Daily Hand & Nail Cream: I bought this bottle when it was on sale after the holidays (€12 instead of €20). Great deal for 250ml (8.4US oz). I love the smell and the pump makes it super easy to get just enough product. The cream sinks into your skin super fast and leaves it nice and soft.


That's all for january. Not alot of products, but I blame the exams for that!

Thanks for stopping by!


x
Tanja


Thursday, October 28, 2010

NOTD: Purple + Glitter

I've been trying to switch up my nail polish more regulary because I have so many colours and I always end up wearing the same ones.


Yesterday I put on Plum Play With Me from Catrice, and I added glitter on my thumbs and ring fingers. For the glitter I used one coat of Models Own's Purple Haze and one coat of Bourjois' Paillettes Disco. I love the glitter, might actually put it on all my nails some time.


Here are the pictures:

Artificial light


Flash


That's it for now, more notd's coming up!


x
Tanja

Wednesday, October 13, 2010

Haul: MAC - Venomous Villains


Last saturday the Venomous Villians collection finally came out in Belgium. I had been waiting for this collection since the first time I read about it, which must have been some time in june. So I had enough time to decide what I wanted and save up for it. 
So a week before the collection came in stores, I went to the MAC store I always go to when a collection comes out to ask if they could put some things aside for me. They said that with this collection they couldn't really do that because it was such a popular collection and they didn't have alot of stock. But a couple people already pre ordered stuff and they said they'd allow it one last time for me. Yay! I was super excited, but then I had to wait another week to take my things home.
One of my friends wanted to check out the collection too. On saturday morning, we got up early so we'd be at the store before it even opened to make sure we could have a look at everything.
When the store opened, first thing I did was pay my things so I knew how much money I had left in case I wanted more things lol. I didn't plan on getting anyhting else, but when the MUA tried the Darkly my dear blush on my friend, I really wanted that too :).

Here's everything I got:


Love the packaging. Looks so pretty in my makeup drawer. Some people think it's childish, but I love how it reminds me of when I was little and watched Disney movies.


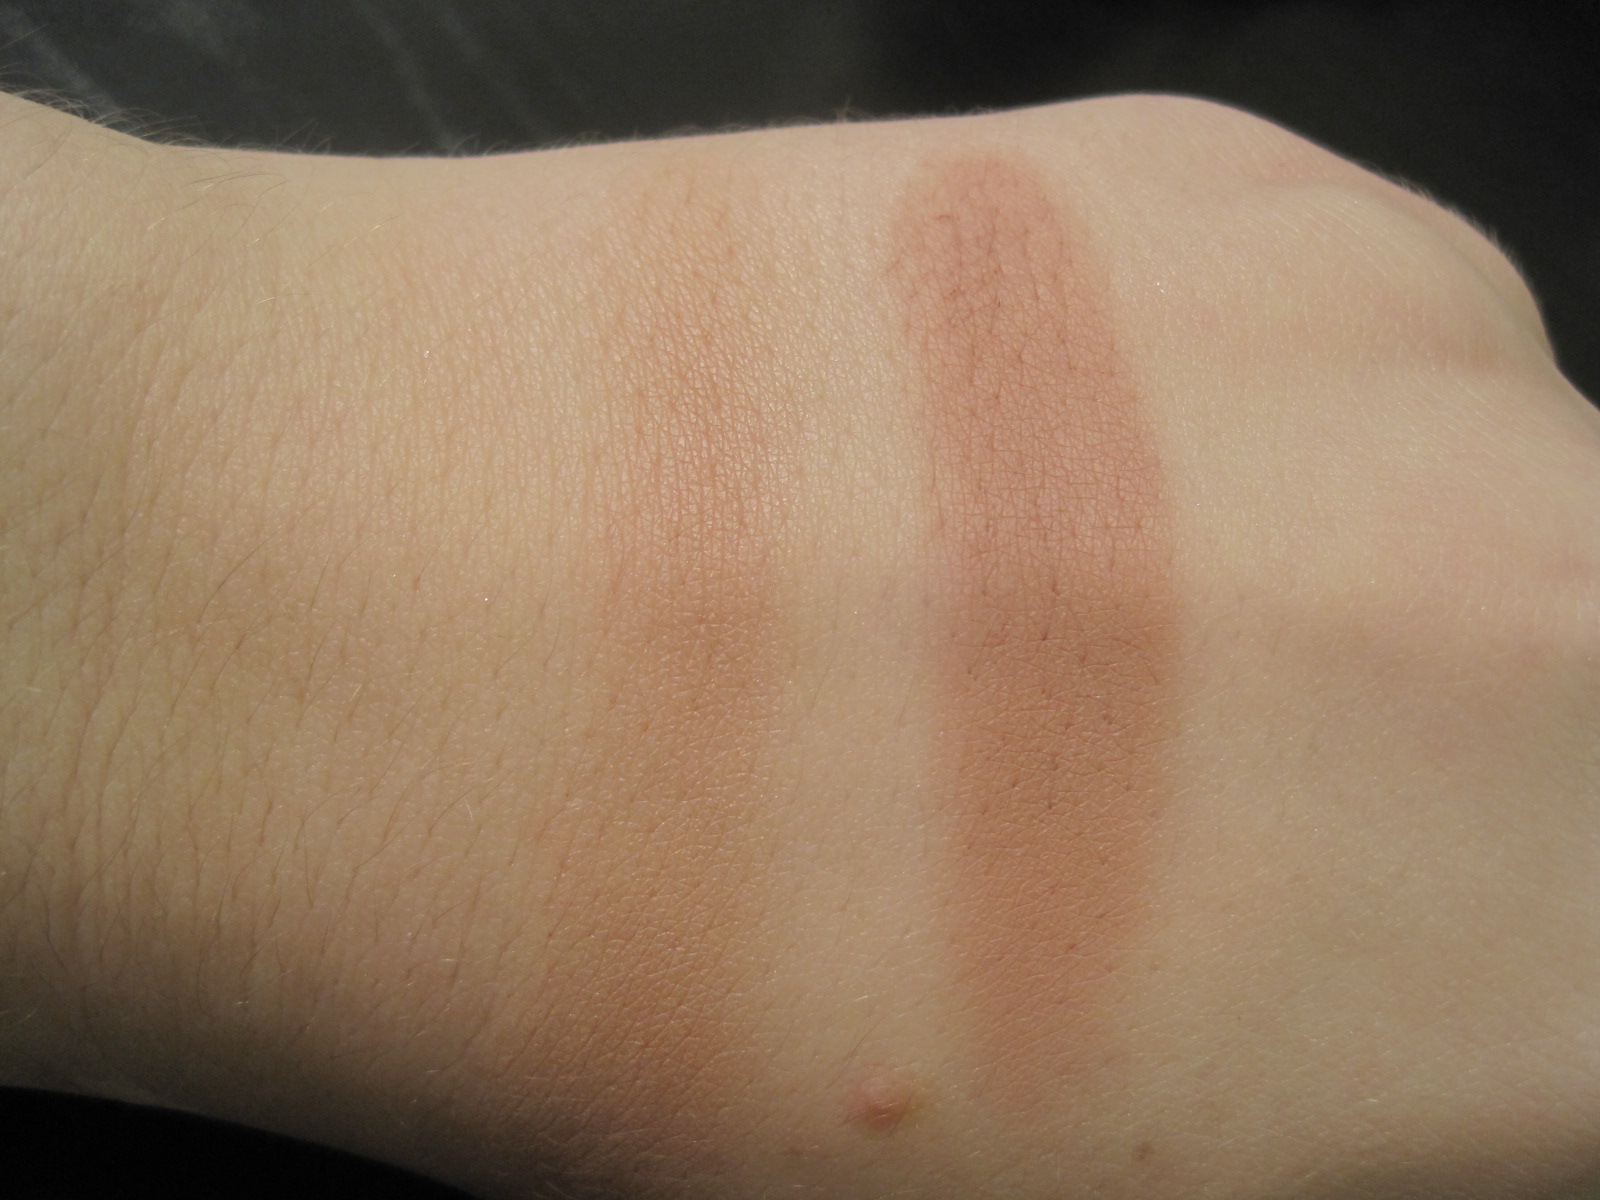
From the 'Cruella' part of the collection I got the 'Her own devices' beauty powder (left) and 'Darkly my dear' matte blush (right).


Swatched on my hand without base.


From 'Evil Queen', I got the 'Oh so fair' beauty powder (left) and two eyeshadows in 'Vainglorious' (top) and 'Vile violet' (bottem).


Swatches on my hand. Beauty powder without base. The two swatches at the top are without base, bottem ones are over Urban Decay Primer Potion. See how a good base makes a huge difference?


From the 'Maleficent' line, I got the beauty powder called 'Briar rose', the mineralized eyeshadow in 'My dark magic' and nail polish in 'Formidable'.


Swatches on my hand. Beauty powder without base. Both parts of eyeshadow swatched first without base, then on UDPP, then foiled (wet) using Fix+.
Gorgeous!


A quick swatch of Formidable nail polish. Swatches on my nails will follow.
 It looks so much more amazing in person!


Lastly, from 'Dr. Facilier', I picked up 'Push the edge' pigment and the greasepaint stick in 'Slick black'.


Swatched on my hand. Pigment swatched dry, over UDPP and foiled using Fix+.


I LOVE this pigment, however, I don't like how it stains when foiled... Anyone else have this problem?
Oh well, it's so pretty I can live with that.


I love everything I got and it was well worth all the hard work to save up for it.
If you you'd like more information about these products, check out Temptalia's videos on the collection which you can find on her youtube channel and website. She does an amazing job at reviewing and swatching products!

Thats all folks.Thanks for stopping by!


x
Tanja


Saturday, October 9, 2010

Haul: Shopping in Antwerp

A while ago I went shopping in Antwerp with my friend Magali.
I always say I don't like shopping, but I actually do unless it's for clothes, and only if its not too busy.

So here are the things I bought. Not just makeup, I got some jewelry too.


 I'll go over each item quickly. If you'd like me to do a seperate review, let me know.

I had been wanting to Hoola bronzer from Benefit. I like using it with my Sigma SS to contour and I really like it so far. Its not too dark and easy to blend. Also like how the colour looks on my skin tone.


At Kruidvat (drugstore in Belgium and the Netherlands) I saw the Dream creamy foundation, which is called Dream smooth mousse foundation in the US and possibly the UK. I got it in the lightest shade which was 08 Light beige. I haven't really tried this product yet but it does feel really smooth.


 We each picked up one of the Bourjois Smokey eyes trios. They were buy one get one free so we split the price of one. Really good deal.
I got the trio in . I think the pigmentation is really nice and I like using these colours for a quick neurtal eye.


I also got 2 of the Catrice lipsticks. I already had 2 colours and I like the texture of them so I wanted to get some more. Plus they're really cheap. I personally never really wear lipstick cause my lips are really dry and it just doesn't look nice. So I mainly got this for when I do makeup on other people.


I also got the kohl from catrice cause I needed a black kohl pencil. Had this one before and I think it's really nice especially for the price.


At Instant Spa, I bought Extravagance by OPI. It's one of the colours from the Designer Series and it is gorgeous. I've always wanted to try OPI polishes but they're really expensive here. When I saw this one, I just had to have it lol. I'll probably look for OPI polishes online in the future tho.


Next: jewelry.

I got two pairs of earrings from New Look. I'd seen the leopard ones before but wasn't sure if I wanted  them or not. Seeing them a second time really made me want to get them, do I did :).
Also thought the little fairies looked really cute.


Then we went in to a store called I Am, which I hadn't seen before. They had lots and lots of nice accesoires. I picked out these gold butterflies. Until then I always stayed away from gold earrings cause for some reason I didn't think they looked good on me. But Magali convinced me to get them and I'm glad she did.


We also stopped at the River Island store which opened not too long ago. On our way to the accessories section, Magali spotted this really cool ring that looked alot like the leopard earrings I had bought earlier. Only problem was that it was too small for me. So we went looking for a larger size, but couldn't find one. Even asked one of the girls from the store if and when they were gonna come back in stock. She said they were gonna get them back in stock but she didn't know when. So I was like ok, I'll just have to come back every day to check if they're back. Then, on our way out, Magali found another one, and it was a bigger one, yay! She then decided to get it too lol.


That's all for now.
Up next: Venomous Villains haul!!

Have a nice weekend.


x
Tanja